Setup
To get started, we setup the programming environment. Follow these couple of steps to get ready, no prerequisites needed.
Visual Studio Code
First, install a code editor. We urge you to instal Visual Studio Code (VS Code) a free and open-source editor developed by Microsoft .
If you don't have Visual Studio Code already installed, download it from their website: https://code.visualstudio.com/.
Profile
To quickstart your VS Code setup, download our profile that includes essential plugins and convenient settings tailored for data science work.
Included Extensions
The profile comes with the following essential extensions:
- Python - Core Python language support
- Python Debugger - Debug your Python code
- Jupyter - Work with Jupyter Notebooks directly in VS Code
Additionally, stylistic plugins are included for a more pleasant coding
experience and auto-save is enabled by default so you never lose your work.

Installation
To activate the profile, you can follow the video below.
uv
From the Python course you should already be familiar with the package manager
pip. That background will help you quickly understand uv, a modern tool
that not only replaces pip for package management but also handles Python
installations.
Why the switch? While pip remains widely used and important to
understand, this course aims to prepare you for modern real-world projects.
uv has become a popular, state-of-the-art tool in modern Python development
and learning it now will give you a competitive advantage.
No prior Python install necessary
A key benefit of uv is that you don’t need to install Python manually.
Install uv
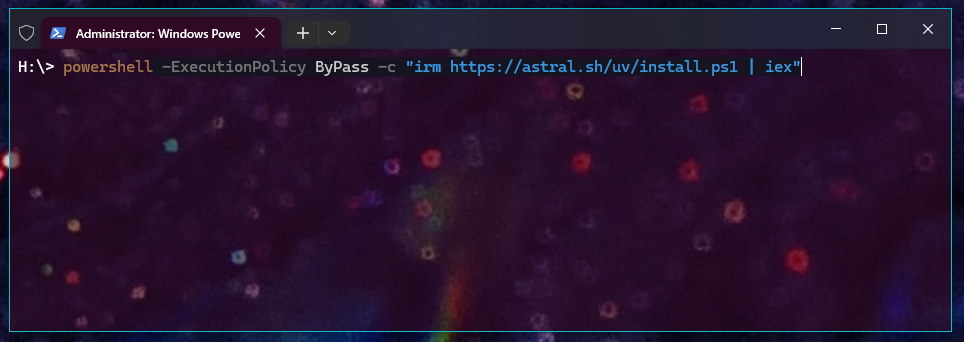
Open Windows Powershell. Visit the uv documentation under under "Standalone
installer"
link.
Make sure the Windows tab is selected.
Return to PowerShell and paste the installer command shown in the docs.
On macOS or Linux, open Terminal. Visit the uv documentation under
"Standalone installer",
link. Make sure the
macOS or Linux tab is selected.
Return to your terminal and paste the installer command.
Press Enter to execute the command
Regardless of your operating system, upon completion you should see something like:
You can now close the Terminal ( macOS / Linux) or PowerShell ( Windows).
Info
The following steps are OS-agnostic; they are the same for Windows, macOS and Linux.
1. Create a project
Now, we will cover a typical workflow to set up and initialize a new project.
Info
A project is a folder that contains all scripts, configuration and data files that belong together. Everything for the project lives in that folder.
Create a new folder named data-science in an easy-to-find location you’ll use
throughout this course.
Open VS Code. Go to File → Open Folder…, select the data-science folder. VS
Code will open a new window.
Tip
For more on navigating VS Code, see the Python course chapter: link
2. Initialize the project
In VS Code, open the integrated terminal (via Terminal → New Terminal).
- With the
--vcsflag a version control system can be specified. By default--vcs gitis set, which initializes a git repository. Since git is not within the scope of this project, we set--vcsto none.
Restart VS Code if command fails
If the command returns an error saying uv was not found, close and reopen
VS Code. This allows your system to recognize the newly installed uv
executable. Then run the command again.
Navigate command history
There's no need to re-type old commands. Press Up / Down to cycle through previously executed commands in the terminal.
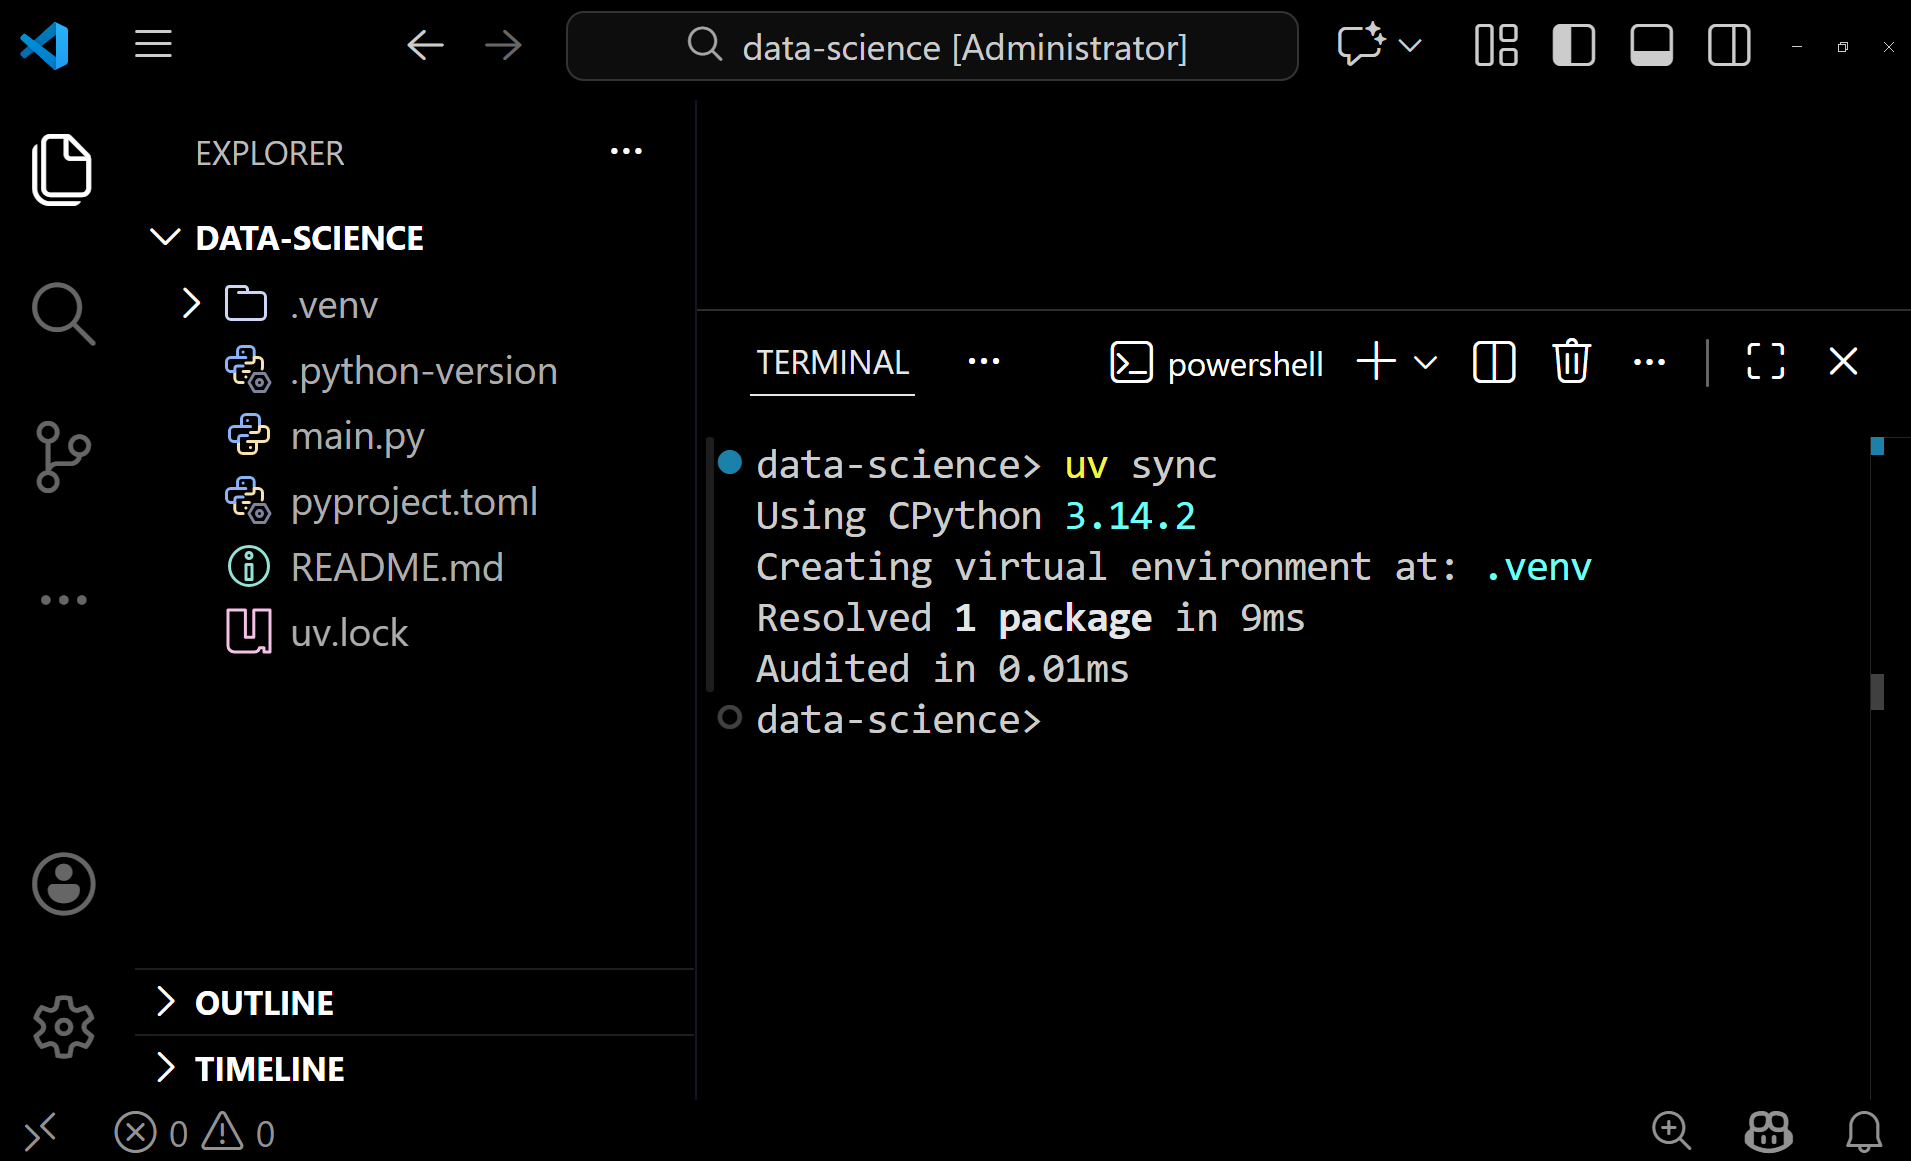
This initializes the project. uv creates a few files in your folder. Your
workspace should look like this:

With the project structure:
Explore the new files
Click through these new files:
.python-versionContains the Python version used by your virtual environment.main.pyAn entry script to verify the setup (we’ll revisit this later).pyproject.tomlProject metadata such as name and version.README.mdAn empty README for a project description; you can ignore it for now.
3. Virtual Environment
With an initialized project we can easily set up a virtual environment. To do so simply run:
Virtual Environments?
If you need a refresh on virtual environments, what they do and their purpose, read through the corresponding section in the Python course: link
What happens during uv sync?
When you run uv sync, three things happen automatically:
-
Python installation:
uvchecks the.python-versionfile and installs the specified Python version if it's not already available on your machine. -
Virtual environment: A
.venvfolder is created at the root of your project, containing an isolated Python environment for your project. -
Dependency locking: A
uv.lockfile is generated. This file pins all package versions used in your project, ensuring anyone else can faithfully recreate the exact same environment.
No manual edits
Since the uv.lock is auto-generated, never ever manually edit this file!
Test your setup
Let's verify everything works by running the main.py script that was created
during initialization:
If you have a similar output, you've successfully created your first project.

No activation needed
Notice that the run command automatically invokes the project's virtual
environment, meaning you do not have to activate the environment beforehand. In
practice that means you create your scripts and simply execute them without an
activated environment.
4. Packages
Since, we will be working with a couple of different packages, we have to discuss commands for installing and removing packages.
Again, no activation needed
Once again, you don't have to activate your environment to install and remove
packages. With uv, you can manage dependencies directly from any terminal in
your project folder, the virtual environment is "handled" automatically in the
background.
To install packages use the add command:
replace <package-name> for example with pandas:
After a successful installation, take some time to open the pyproject.toml
file. Under dependencies you should find the pandas package.
| pyproject.toml | |
|---|---|
The content of uv.lock was changed as well, the file contains more info on
the installed packages such as pandas and its dependencies as well (i.e.,
numpy, python-dateutil, six and tzdata).
Share a project
If you share your project, be sure to include the files .python-version,
pyproject.toml and uv.lock. These allow for a recreation of your virtual
environment.
Let's remove the package with the remove command:
Again, you can check both pyproject.toml and uv.lock which are
automatically updated accordingly.
Get a script running
-
Create a new script called
plot.py -
Paste following example (taken from matplotlib docs) within your script:
plot.py -
Determine necessary packages to get this script running and install them with
uv. -
Lastly,
runthe script withuv.
Python Scripts or Jupyter Notebooks?
For this course, you can work with Python scripts (.py files) and/or Jupyter
Notebooks (.ipynb files). Both are supported in VS Code and each has its
strengths.
-
Python Scripts
Advantages
- Better for production code and reusability
- Easier version control and collaboration
- Runs faster without cell-by-cell overhead
- Cleaner debugging with standard tools
Disadvantages
- Less interactive during exploration
- Need to rerun entire script for changes
- Harder to visualize intermediate results
-
Jupyter Notebooks
Advantages
- Great for exploration and prototyping
- Inline visualizations
- Combines documentation and code
- Easier to share findings with non-programmers
Disadvantages
- Can become messy with non-linear execution
- Harder to maintain as projects grow
- More challenging for version control
- Not ideal for reusability
Our recommendation
Many data scientists use both: notebooks for exploration, scripts for production. Simply experiment with both. For quick prototyping lean towards a Jupyter Notebook. For more refined code switch to Python scripts.
Wrap-Up
You've successfully set up your development environment! Throughout this course, you'll create multiple projects using the workflow covered in sections 1-4. Don't worry about memorizing every step—just refer back to this page when needed.
For quick reference, here's a cheat sheet: